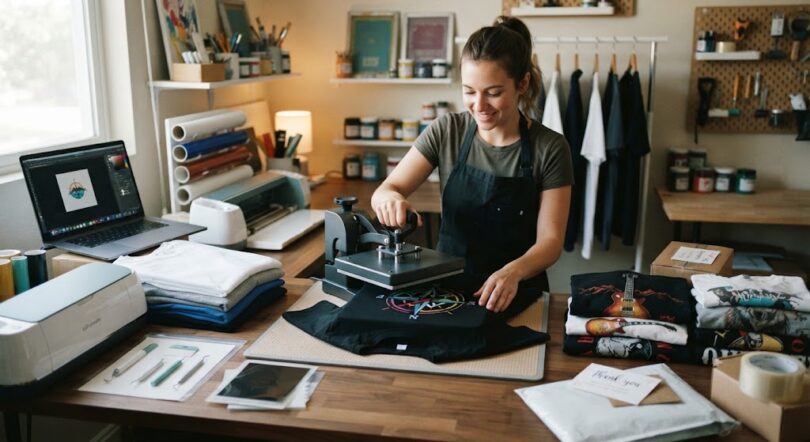

This guide walks through each step, from picking your niche to pressing your first order, so you can avoid the most common beginner mistakes.
Step 1: Choose a niche before you design anything
The biggest mistake new shirt sellers make is trying to sell to everyone. Generic designs compete with millions of other shirts. A clear niche makes it easier to design, market, and stand out.
Good niches are groups of people who share a strong identity and like to show it. Some examples:
- Local: your city, neighborhood, or local sports teams (using your own artwork, not official logos).
- Professions: nurses, teachers, truck drivers, electricians, and other proud professional communities.
- Hobbies: fishing, gaming, gardening, running, book clubs.
- Events and groups: family reunions, school clubs, church events, small businesses that need staff shirts.
A quick test: if you can picture exactly who is wearing the shirt and where they wear it, your niche is specific enough.
Step 2: Understand the main printing methods
How you print affects your costs, quality, and workload. These are the four options most beginners consider:
| Method | Best for | Trade-offs |
| Screen printing | Large runs of simple designs | Setup per color and minimum orders; expensive for small batches |
| DTG (direct-to-garment) | Detailed designs on cotton | Costly printers; works best on 100% cotton |
| DTF (direct-to-film) | Full-color designs in any quantity | Requires a heat press to apply; you order or print transfers |
| Print-on-demand platforms | Zero inventory | Lower margins and less control over quality |
For many home-based businesses, DTF is the easiest starting point. The design is printed onto a special film, coated with adhesive powder, and cured. You then press the finished transfer onto the shirt with heat. You don’t need to own a printer: you can order ready-made transfers from a print shop and focus on pressing, packing, and selling. DTF also works on cotton, polyester, and blends, which gives you more freedom when choosing blanks.
Step 3: Source quality blank shirts
The blank shirt is half of your product. A great design on a scratchy, poorly fitting tee won’t bring customers back. When choosing blanks, pay attention to:
- Fabric: ring-spun cotton and cotton-poly blends feel softer than basic heavy cotton.
- Fit: modern unisex fits tend to sell better than boxy, oversized cuts.
- Size range: make sure the style comes in the sizes your niche actually wears.
- Color availability: stick to a few core colors at first, like black, white, and heather gray.
Some suppliers make this easier by selling both sides of the product. Iris DTF, a print shop in the Dallas-Fort Worth area, offers blank apparel such as t-shirts, sweatshirts, and tote bags alongside its printed transfers, so beginners can source their shirts and their prints from one place instead of coordinating two separate orders.
Step 4: Get the right equipment
If you’re pressing transfers yourself, your starter kit is small:
- A heat press. A clamshell or swing-away press gives even heat and pressure. A household iron can work for a few personal shirts, but a press is worth it once you’re selling.
- A protective sheet. A Teflon or parchment sheet protects the shirt and the press surface.
- A measuring tape and ruler. Consistent placement makes your shirts look professional.
- Packaging. Poly mailers or boxes, plus labels, for shipping orders.
Always follow the temperature, time, and pressure settings your transfer supplier recommends. Settings vary by product, and using the wrong ones is the most common reason a print peels or cracks.
Step 5: Prepare print-ready designs
You don’t have to be a professional designer, but your files do need to be print-ready. Keep these rules in mind:
- Work at the final print size, usually around 10 to 11 inches wide for an adult front print.
- Use a resolution of about 300 DPI at that size, so an 11-inch-wide design should be roughly 3,300 pixels wide.
- Save files as PNG with a transparent background, or as PDF, and make sure all images are embedded.
- Use only artwork, fonts, and images you have the rights to use. Avoid brand logos and famous characters unless you have a license.
Step 6: Price your shirts for profit
Many beginners price too low and end up working for free. Add up your real cost per shirt:
- Blank shirt
- Transfer or print
- Packaging and labels
- Platform or payment processing fees
- Shipping (if you don’t charge it separately)
Then price for a healthy margin on top of that total. A common starting point is to aim for a retail price of at least two to three times your product cost. Custom and niche designs can usually support higher prices than generic ones, because customers are paying for something they can’t find elsewhere.
Step 7: Choose where to sell
You don’t need to be everywhere on day one. Pick one or two channels and do them well:
- Marketplaces like Etsy, which bring built-in traffic.
- Your own online store, which gives you more control and better margins over time.
- Social media, where short videos of the pressing process often perform well.
- Local sales at markets, school events, churches, and small businesses.
Group orders from local teams, clubs, and businesses are often the fastest way to make your first real sales, because one customer can bring in a dozen shirts at once.
Step 8: Launch small and learn fast
Start with three to five designs, not fifty. Order small quantities, see which designs sell, and reorder the winners. Ask early customers for photos and reviews, and use that feedback to improve your next designs.
Before you sell, also check your local requirements for registering a business and collecting sales tax. The rules vary by city, state, and country, and it’s much easier to set things up correctly from the start.
Final thoughts
Starting a custom t-shirt business from home is more accessible than ever. Choose a clear niche, pick a printing method that fits your budget, invest in good blanks and a reliable heat press, and price for profit from the start. Keep your first launch small, listen to your customers, and grow one design at a time. The businesses that last aren’t the ones with the most designs, but the ones that know exactly who they’re making shirts for.